Simple Texturing
A texture map or texture image is a two-dimensional image file, like a JPEG or a Windows BMP file, that is used to apply color to a 3-D model. It is called a “texture” because one of the earliest uses of this technique was to apply an interesting texture to walls and floors that would otherwise be one flat, plastic-looking color. Nowadays texturing is so common in 3-D applications that it is often the only thing used to apply color to models–without texture maps, many models would simply be white.
There are a vast array of rendering effects that can be achieved with different variants on texturing. Before you can learn about them, it is important to understand the basics of texturing first.
In simple texturing–by far the most common form–you can think of the texture map as a layer of paint that is applied to the model. In order for the graphics hardware to know in what direction the paint should be applied, the model must have been created with texture coordinates–a special (u, v) coordinate pair that is associated with each vertex of your model. Each vertex’s (u, v) texture coordinates place the vertex at a particular point within the texture map, in the same way that the vertex’s (x, y, z) coordinates place the vertex at a particular point in 3-D space.
These texture coordinates are sometimes called uv’s because of the (u, v) name of the coordinate pair. Almost any modeling package that you might use to create a model can create texture coordinates at the same time, and many do it without even asking.
By convention, every texture map is assigned a (u, v) coordinate range such that the u coordinate ranges from 0 to 1 from left to right, and the v coordinate ranges from 0 to 1 from bottom to top. This means that the bottom-left corner of the texture is at coordinate (0, 0), and the top-right corner is at (1, 1). For instance, take a look at some typical texture maps:

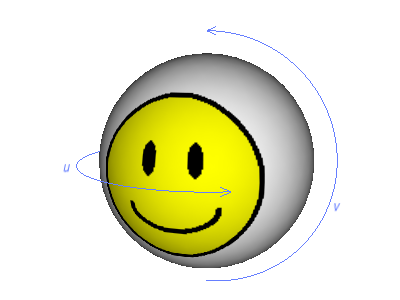
It is the (u, v) texture coordinates that you assign to the vertices that determine how the texture map will be applied to your model. When each triangle of your model is drawn, it is drawn with the colors from your texture map that fall within the same triangle of vertices in (u, v) texture map space. For instance, the sample smiley.egg model that ships with Panda has its vertices defined such that the u coordinate increases from 0 to 1 around its diameter, and the v coordinate increases from 0 at the bottom to 1 at the top. This causes the texture image to be wrapped horizontally around the sphere:
Note that the (u, v) range for a texture image is always the same, 0 to 1, regardless of the size of the texture.