Running your Program
Using Command Prompt to Run your Program
You can run your script by using your computer’s ‘Command Prompt’. You can access this by clicking ‘Start > All Programs > Accessories > Command Prompt’, or by going to ‘Start > Run’ and typing ‘cmd’. When it opens, it should look something like this:
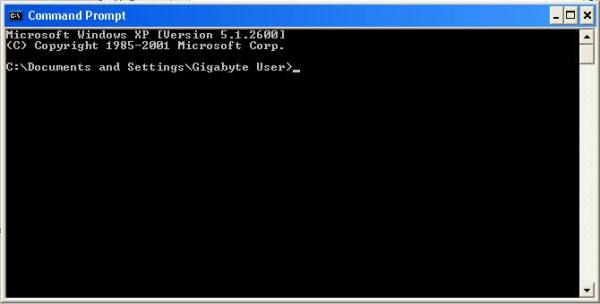
At the moment it’s pointing to its default directory, which in my case is
‘Documents and Settings’ (it doesn’t matter if yours is different). We need
to change the directory to the one where we saved our script. To do this, we
use the cd command. This stands for ‘change directory’. Type the
following text behind the > symbol:
cd C:\Panda3D-1.9.4\mystuff\
Instead of version 1.9.4, you should type the version number of Panda that you have downloaded and installed. Please note that this folder name is case- sensitive and must match exactly (other than the version number, of course). Then, press the ‘Enter’ key on your keyboard. You should now have the following on the Command Prompt:
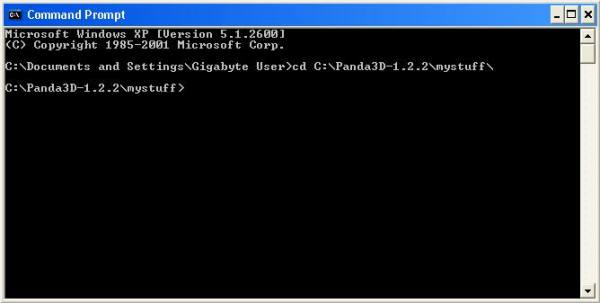
This means that it’s now pointing to the right directory. To run your script and start Panda3D, type the following text behind the > symbol:
ppython myscript.py
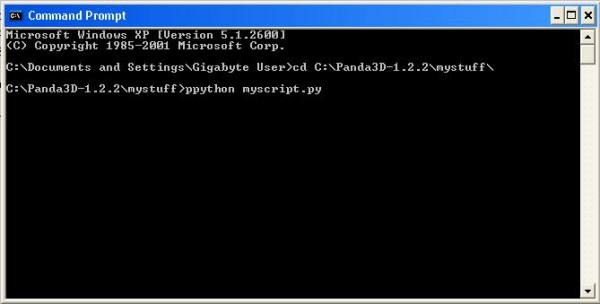
Press the ‘Enter’ key on your keyboard. This will run the version of Python that is distributed with Panda3D. If all is well, Panda3D will start and you should see the main rendering window appear.
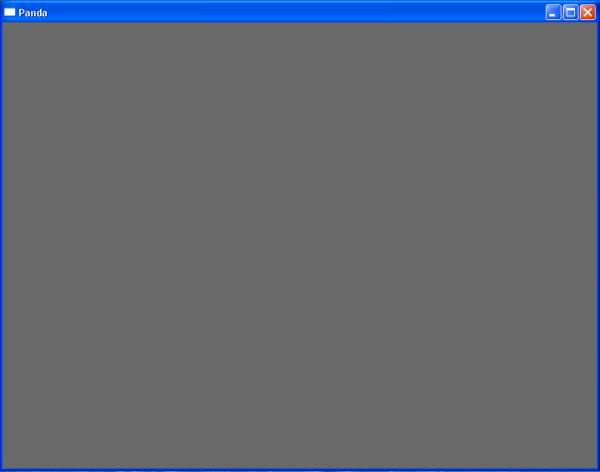
This is a empty program, it won’t do anything. The next step is to add additional commands to the program, as described in one of the following tutorials.